How To Shoot Video with DIY Glidecam

Test Video - Shot with My DIY Steadicam


Everything I know about building a DIY steadicam is now is in this new guide. Learn how to get amazing cinematic video with this cool gadget that you can build using parts from your local hardware store.

If you don't like the material, no worries. I'll give your money back and you get to keep the guide. Guaranteed!


  • Printable PDF document
  • Instant Digital Download
  • 60 Days Money Back Guarantee 
  • Prompt Refunds No Questions Asked
  • One Time Payment/No BS
  • 2 FREE Bonuses:
    • How To Build a DIY Camera Slider
    • 3 Ways To Get Clients as a Videographer (you'll be surprised to find out what the first method is...)
Add To Cart DIY Steadicam Ebook
---


-----
Since I'm no longer selling the DIY Highball steadicam, you may wanna check out these other camera stabilizers. Click on any picture.
GoPro Smoothee Stabilizer by Steadicam
Glidecam HD 2000
Flycam Stabilizer
Check out the stabilizers on Amazon CanadaAmazon.UK and Amazon.DE.
-----

I was supposed to take photos at my cousin's 4th grade graduation but instead I shot a video. It was another occasion to test my DIY glidecam and plus - I made her a star. :-)

Shooting video with a glidecam it's not only fun but it let's your creativity explode. You become more or less a bit of everyone on a movie set: you're the director, the cameraman, the technician, the guy with the lights, the screenwriter, etc. Just playing with the camera mounted on a steadicam makes you wanna experiment more that you would normally do with a hand held camera. I've seen both from the comments on YouTube as well on this blog that some of you have problems balancing your glidecam. There are a few simple steps for getting it right but the key is to have your glidecam built in a smart design that allows fast adjustments without too much hassle. Some key features of such a design include:
  • A telescopic tube for the shaft. If you can add the gimbal to a telescopic tube then you're one step closer to a professional glidecam. This will help you raise or lower the center of gravity in a snap!
  • If you can't integrate a telescopic tube then use a threaded bar. In this case you can make your adjustments either by moving the gimbal on the bar or by moving the upper and lower plates. Please note that the bearing is slid onto the bar and hold in place with two nuts tightened against each other ( the bearing being fixed between them).
  • Plates with channels for sliding the weights.
  • A smart plate for the camera. I couldn't find a self sliding plate but I drilled many holes in the laminate flooring (of which my plate is made) as to accommodate different types of cameras.
  • Wing nuts instead of regular nuts. Faster to operate and of course you won't need to carry any wrench with you. :-)
DIY Glidecam How To Balance Your Glidecam You should know that I only refer to the classic glidecam, not the Merlin design. Unlike the Merlin, the normal camera stabilizer has some advantages:
  1. You can do 360° turns without having to move. Just stand still, raise the gimbal handle slightly above your head (it depends on how long the shaft is) and start rotating the camera around it's own axis by spinning the shaft.
  2. You can make the glidecam top heavy and have the camera down and the weights up. This allows you to shoot at ground level - which is great when following a walking person (or a dog or even with no subject - sliding 5 centimeters above the ground creates an amazing effect).
  3. You can shoot in all directions: forward, downward and upward. You can easily tilt the shaft with the left hand and thus point the camera wherever your subject is. The beauty of it is you can raise it above your subject and have a bird eye's view along with the gliding effect. That's pretty neat!
When balancing the glidecam you must have in mind that the center of gravity must be just below the gimbal as for the system to reach a state between a stable equilibrium and a neutral equilibrium. The videos below explain how to accomplish that. Even though they are using professional camera stabilizers all the principles apply to your own DIY steadicam as well. You can measure the balance of your rig by checking the drop time (1.5 to 3 seconds) and by spinning the glidecam to check for dynamic balance (watch first video - minute 6.50). Please note that while your home made glidecam may not have a sled (with a battery and remote monitor), it has the bottom weights plate instead (just like the glidecam in second video). Use the weights on the plate for fine tune balancing. How To Shoot Video with a Glidecam What you wanna shoot with a glidecam is a moving subject. That's the main purpose of any camera stabilizer - to help you capture a steady footage while following your subject (even on uneven terrain - no pun intended). You must know that the only thing a home made glidecam does is to keep your camera horizontal. That's it! The gimbal separates the movement of your hand, absorbing the jolts with it's three axis of rotation. The gliding effect is produced by our arm and by our walking with the subject. A professional steadicam comes with a mechanical articulated arm and a body vest that helps the operator to shoot without holding the weight of the entire system. Professional camera gear is both bulky and heavy and this comes in handy for the cameraman. In our case the articulated arm is no other than our own arm. Yes. We have three joints that absorb the shocks of our walking: the shoulder joint, the elbow joint and the wrist joint. All these together along with our knees and ankles provide the flying sensation (in the video) as we move our glidecam and camera through space. This gliding effect is also caused by the weight of the whole system. In other words - the heavier the system the more stable it will be when running after your moving subject. As you run, passing over obstacles (small rocks, etc), the camera tends to follow a straight line due to the inertia of the whole rig (camera and steadicam) - that's the gliding outcome. In order to get really smooth video you must practice holding the glidecam, tilting it, running with it, rotating it, etc. You'll get accustomed to it's sensibility and you'll become better with each small victory. GoPro on DIY Camera Stabilizer Tips for glidecam video shooting
  • Shoot your moving subject from all directions. Walk before it, behind it, in lateral - and of course you can combine any of these methods with shooting from above (hold the glidecam up) or from below (make the glidecam top heavy as to have the camera down). Example: shoot from lateral and above or from behind and low. Mix all these techniques together wen editing the footage. If you shot with your camera upside down, rotate the footage within the video editor.
  • Give 180° capturing your passing subject. You can do this in two ways:
  1. Stand still and spin the camera on the shaft as to follow the subject (the camera rotates on it's axis)
  2. Move your arm describing half a circle, keeping your camera pointed at the subject. You will get an awesome movie like effect as the camera sweeps the landscape in an interesting way.
  • Rotate around your subject. Go round the subject and keep the camera pointed at all times towards the center of the imaginary circle.
  • Run after your subject. This will make your friends ask "How did you shoot that?!". The glidecam proves it's value when you get the steady footage while running with your subject. I was pretty blown away by that. :-) You can also run in front of your fast moving subject, just be careful not to trip as you're stepping backwards.
  • Move the camera against the subject (which is coming towards you) and pass it laterally. I stole this technique from a friend of mine - Brant Dempster. I'm sure I've seen this in movies as well but I just wasn't aware of it as I am now.
  • Follow the subject from behind, laterally and eventually end front shooting. Again this is a movie like technique that empowers the viewer. It makes the people watching the video feel they were there and thus they got the full picture (subject plus the landscape).
This list is by no means exhaustive and it's based solely on my observations of other's work. Feel free to correct me or add your experience in the comments. I'd love to hear from you. DIY Steadicam for GoPro Shot videos using your DIY Glidecam! Cheers!

Why You Don't Have To Shoot Video in HD Mode with GoPro HD Camera

GoPro Slow Motin Screen Capture

Just a short note for mountain bikers and other extreme sports lovers out there that have bought or wanna buy the new GoPro HD camera.

You don't really need to shoot your outdoor video clips in HD. The high definition footage offers great video quality but you'll have a hard time importing and editing it into your video editor.

Instead you can shoot in lowest resolution (r1) - 840/480 pixels at 60 fps 0r 120 fps with the HD Hero 2. The files are lighter (unlike the full HD videos) and thus easier for your video editor to handle. The video above was shot in r1 and the sharpness is just as good as with HD settings.

GoPro Editing Software

The 60 frames per second footage allows you to render action sports scenes in slow motion better than say full HD at 30 fps. You'll get smooth slow motion video, that is.

You may want to convert the GoPro MP4 clips to AVI before you do any editing on it.

A new friend of mine, Raul Robino, suggested a forum (GoPro User Forum) that teaches you how to render your video in slow motion using a video editor/mixer called tsMuxeR. You may wanna check that out.


And since we're here, let me show you the best dirt bike video ever!!! Shot with GoPro HD. And notice that the video is great mostly because of the editing, the awesome angle shots and the great stunts that those bikers pull - video quality is secondary (that's my opinion).


A wicked GoPro HD slow motion video suggested by Raul - freestyle skiing


Shoot your mountain bike adventures!

Watch Free Online Movies


Watch Free Movies Online
Update: The site (movie-links.tv) has been seized for copyright infringement...

But you can watch free online movies by typing watch...your title...online free on Google and you'll land on the right websites. ;-)

However, if you wanna watch your favorite movies in high quality for the minimum cost and without leaving your home, check out Amazon Prime Instant Video. You'll love it.

--
Here's one for the internet enthusiasts - me being one of them.

Perhaps you've wondered many times how can you watch free online movies. Well, there's a site called Movie-Links.tv that offers just that - free online movies.


The site is basically a data base with movie titles. You can search the movie that you want to watch for free and then you'll get a list (search results) with titles that contain your keywords. If you enter the title correctly you usually get your video on top of the list. All the other movies that contain similar keywords will be listed below.

Click on your desired movie title and you will get another list with sites that host and stream the movies for free. Sites like this are: LOMBOO, MEGAVIDEO, etc. Your film is shown as being hosted on more sites and each movie source has a ranking given by users/viewers. It's nothing more than a grade on the quality of the movie and the playback reliability of the website/player.

Usually stuff hosted on LOMBOO or MEGAVIDEO work fine, as well as movies played with JW Player - that's the embedded player running on the web page (it's not something you need to download or install). Movies that display the Div X logo usually never load so you might as well skip those.

I guess those sites bring in revenue by affiliate links and banners, direct advertising banners and maybe Google AdSense so you have to work your way through tons of advertisements - including pop up and pop under ads... It can be pretty annoying but consider that to be the traffic nuisance until you reach the cinema. :-)

Some sites will also ask you for human verification so click on that. Then you'll get an ad just on top of the player - hit the play button once or twice and the ad will eventually fade out. The images below show you the process.

I've watched and enjoyed for free:
All the above are very good movies and the links lead directly to the free player page.

I guess we all know whether the service those sites provide is illegal or not. No comment on that.

Stay tuned! Power to the users!

Free BMX T shirt Design - Chill Ride

BMX Free T-shirt Design for PrintDownload this BMX T-shirt design in vector format (SVG) here


Have you ever noticed how the BMX riders and street bike riders stand on the pedals with one of their knee flexed and tucked in above the frame? And then they sit on their low saddle and cycle in a laid back manner. That's what I call chill riding.

I find myself chill riding after a downhill ride - when I get my saddle as low as possible. I get out of the forest and I slide down the streets with a big grin on my face. It doesn't matter what specialty one has with biking but it's certain we all like downhill.

My suggestion for printing your BMX T-shirt and hoodie

Go out and cycle!

How To Design Cycling Jerseys - Design Your Own Mountain Bike T-shirt

Design Cycling Jerseys

Scroll  the page to learn how to design your own cycling jersey and mountain bike T shirts using a free vector graphics editor and YouTube.

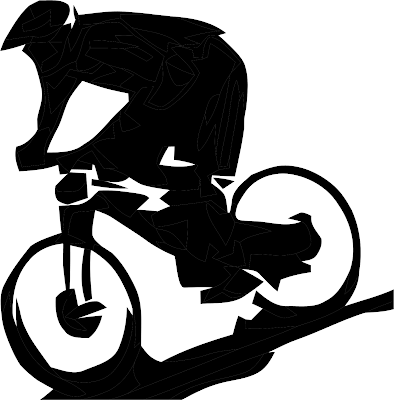
Vector MTB DH T shirt DesignDownload the Cedric Garcia design for your mountain bike T shirt in vector format (SVG) here and in GIF format (with transparent background) here

Downhill Vector PrintDownload the black MTB silhouette in GIF format here

How To Design Your Own Mountain Bike T-shirts

You may ask yourself how I create these designs that I print on Highball bike jerseys. It's not rocket science, I'm telling you!

If you're not an artist, that is you have little skill in hand drawing, you can create such designs by using simple computer graphics software like Inkscape or Microsoft Visio. So if you'd like to design your own bike T shirts you should be able to do it easily after reading this post.

Let's take this downhill bike jersey as an example. The shapes you see here - lines, the black lighting bolts, etc - are done with the simple tools in the above mentioned software and then filled with the bucket icon. Some of the fills are gradient but I don't encourage you to work with gradient fills as you'll have trouble when printing the T shirts - most printing methods cannot deliver gradient prints. So work with single color solid fills. The garment manufacturer that makes the Highball cycling line doesn't have printing technology that works with gradient fills. That's why the actual jerseys were printed in solid colors.

Mountain Bike Vector Design
While the lines and shapes are easy to create, let's look at the mountain biker design that is printed on the polyester jersey. Here's how you can make it:
  • Firstly, look on YouTube for a mountain bike video or BMX bike video that inspires you. This downhill silhouette is none other than the famous DH rider - Cedric Garcia. :-) I used the Cedric Garcia video below and I took a snapshot of it at second 42.
  • Pause the video at a point where the biker is in full view. You should make sure the biker is contrasting against the background, otherwise the vectorization process will blend the athlete with the landscape behind him. For example a brightly colored biker against green grass will make a good design to work on.
  • Make a print screen of the paused video and save it as an image file. I hit the Prnt Scrn key and then paste (Ctrl+V) the result in Paint (basic drawing software that comes with Windows). You may want to crop the image just to fit the biker - don't leave too much of the useless margins.
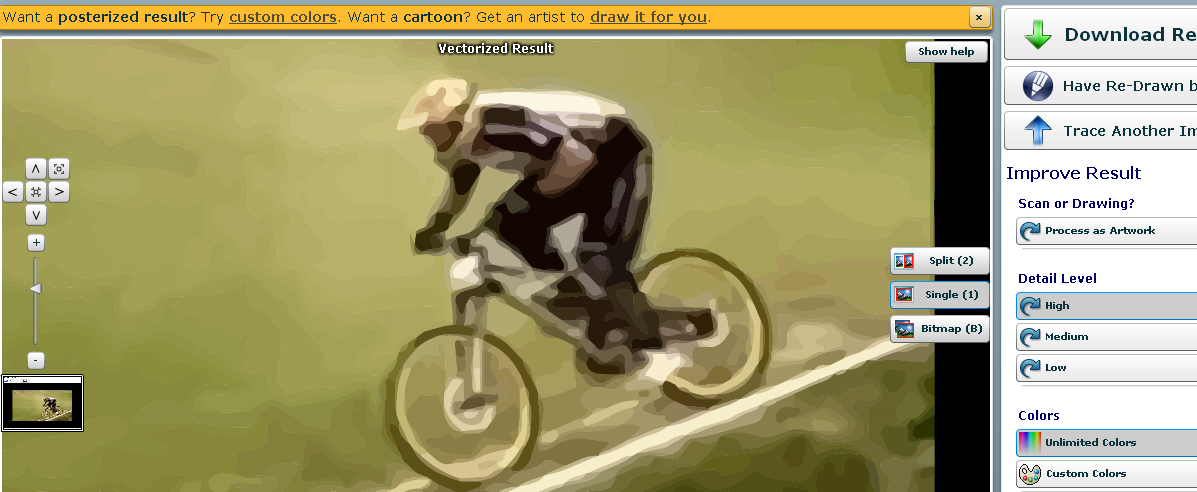
  • Vectorize your image. You can do this for free with Inkscape. Open the image in the vector editor, click to have it selected (with the arrow tool), go to Path/Trace Bitmap..., select Colors button in the lower cassette, click OK. You will get a vectorized version of the image that you can then edit piece by piece, that is eliminate portions of the image until you have only the biker silhouette. You can do this with the tool below the plain arrow (arrow and line with dots).
  • Vectorize your image with Vector Magic. Vector Magic is a web service that lets you upload and vectorize your images. It's great for logo re-size and other image enhancements. The first two vectorizations are for free so go check it out. I use this instead of Inkscape as it's more accurate.
  • Edit your vector drawing in Inkscape or Visio by changing the colors of the biker, adding text, shades, whatever. Eliminating the background as to remain only the MTB design on a white background is a tedious task. I didn't find any other way than manually selecting the color patches and deleting them. The same with color change - for cotton T shirts prints you may want to work with three colors max. Sublimation prints on micro mesh polyester can handle infinite colors but that's considerably more expensive.
  • Export your design in high resolution to a PNG or GIF file. In the Save As... window choose the file type. Don't forget to save your file in SVG format as well. You may come back to it later and edit it some more.
The images below describe the process. If you want to do this and have problems please leave a comment or write me an email. I'll get back to you as fast as I can.

Design Mountain Bike T shirtsVectorization in Inkscape

Downhill MTB Vector DesignVectorization in Vector Magic

Design Cycling JerseysEditing vector drawing in Microsoft Visio

Mountain Bike Shirts
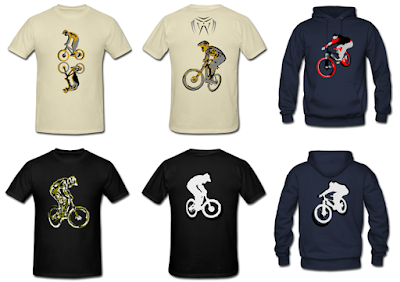
My suggestion for printing your mountain bike T shirt or hoodie

Go mountain biking!

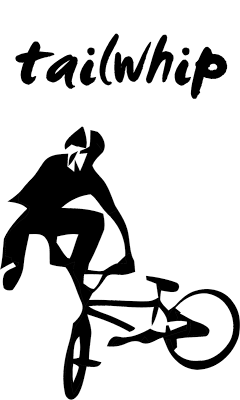
BMX Tailwhip T shirt Design

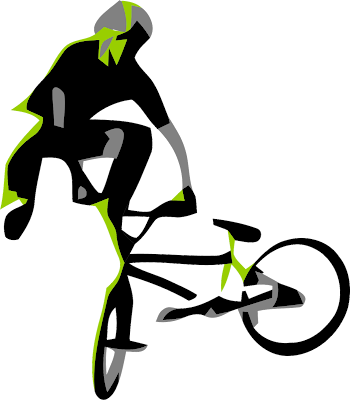
Tailwhip BMX T shirt DesignDownload this vector design for your BMX T-shirt here

BMX T shirt - Tailwhip
This particluar BMX design was printed on micro mesh polyester for a client of Highball. The synthetic fabric of the bike jersey supports sublimation printing which gives infinite possibilities.

Sublimation allows for the color (dye) to permeate the polyester molecules and thus the colors, design or shapes will never fade. That is, there is no limit in the number of colors and the quality level of detail fine prints is as high as possible. This is accomplished by the vector format of the drawing that delivers infinite image resolution. The printer works with vector files (EPS, SVG) and picks up all the shapes that are then printed onto the garment.

You can download the color design (first picture in this post) in SVG format and modify colors using Inkscape - Open Source Scalable Vector Graphics Editor. I made it available only in three colors (green, gray and black) for you to be able to print it with Spreadshirt - they accept three color designs for certain T-shirt printing methods.

BMX Shirts and HoodiesPrint your BMX Tailwhip T-shirt or hoodie - this is my suggestion


Learn more about the difference between vector files and bitmap images here.


Keep rocking that BMX bike!