Update: The contest has reached its deadline and the winner is Ady Nechita, responsible for the base jumping videos in Bucegi Mountains (first time ever). Thank you all for entering! Subscribe to not miss future software giveaways!
--
You probably got a new camera.
Either as a Christmas gift or as a birthday present. Or maybe you just bought one for yourself. Doesn't matter. (Was it a GoPro?)
What matters though is you wanna shoot and edit videos.
So if your current video editor can't handle MP4, MTS (AVCHD), MOV or MKV files, here's your chance to win an easy to use, yet powerful, video editing software: Magix Movie Edit Pro Plus.
If you wanna come along on the way to edit better videos, join me on my new site VideoEditingSoftware.com.
If you don't - well, you may be missing out. Magix and Corel already jumped in as sponsors and they're giving away free serial numbers so you can have an original copy to work with on your web movies.
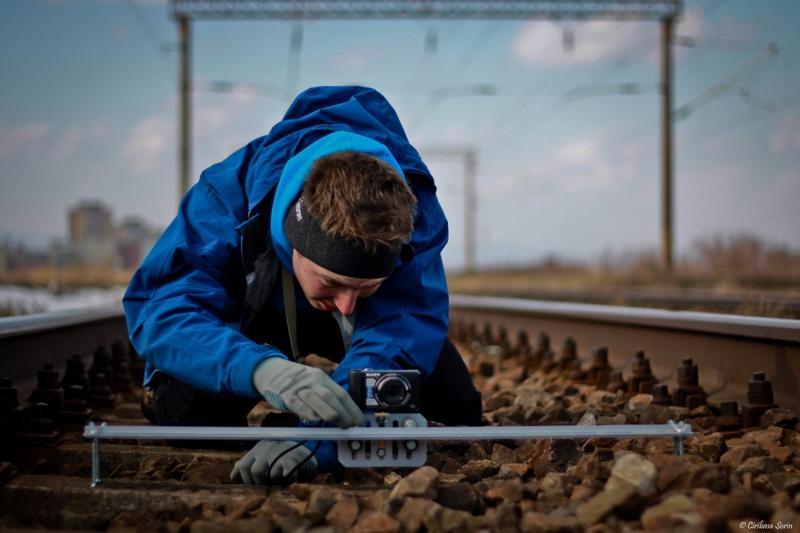
I never left home with the intention of stopping a train but...sh*t happens.
So if you've been following this blog for a while, you know I enjoy doing videos. And I thought shooting some footage on the railways would probably be fun. And it was.
If you don't like the material, no worries. I'll give your money back and you get to keep the guide. Guaranteed!
Printable PDF document
Instant Digital Download
60 Days Money Back Guarantee
Prompt Refunds No Questions Asked
One Time Payment/No BS
2 FREE Bonuses:
How To Build a DIY Camera Slider
3 Ways To Get Clients as a Videographer (you'll be surprised to find out what the first method is...)
---
Would you like to learn how to shoot DSLR videos from a pro?
I know I would. So let's learn together from Devin Graham - famous for his awesome nature and extreme sports videos on YouTube (watch them below).
He's gonna release tutorials and behind the scenes videos on his new YouTube channel. So subscribe and keep yourself informed about the tricks he pulls to film and edit all his videos.
I've been asked how I shot certain scenes in the above bike tricks video and I decided to publish some pictures with my GoPro mount improvisation for the bike fork. I hope this explains it better than words.
What you do is wrap the straps around one of the fork tubes and clip in the camera (quick release buckle). Use the two piece arm (goose neck) with the buckle and point the camera in as many directions as possible:
you want to capture the biker who's pulling the stunts
shoot only the wheels, pedals and feet of the biker
shoot forward to capture the obstacles
etc.
Mix all the scenes to make your clip interesting to watch.
Disclaimer: I'm an amateur filmmaker and I share as little as I know with you. You're invited to a conversation in the comments. There's always something new I can learn from you and I'd love to hear your opinion. Thanks!
Update 20 Feb 2011: The sound issue can be fixed if you export your clip at 29.97 frames per second (no more clicking noise). Also, Magix has released patches that fixed this.
You don't need to convert the MP4 clips, just import them directly, edit them and then export in MP4. Pretty neat!
So I've been using Magix Edit Pro version 15 and 16 for editing my outdoor videos since January 2010. While I love the workflow and the editing capabilities of the program, there is always something wrong:
I can't create projects longer than 2-3 minutes. All my videos longer than 3 minutes were done by merging 2 or more clips - clips that were edited and exported beforehand. These problems are not exactly software related but they're more a consequence of me running Magix on a weak laptop computer. One can't expect to edit HD without dedicated video graphics card...
When I do manage to export a video - the original quality of the footage is lost... Even if the output is in HD, the image itself looks pixelated. And sometimes I get this strange effect that blurs the footage at every second (like at 33 seconds playback in this climbing video).
Okay. The video editor is not perfect but I work with it nevertheless (I purchased it). I don't want to go through the trouble of using an MP4 to AVI converter coz it takes too much time and the resulted AVI files occupy too much space on my hard drive.
It works GREAT! It imports long videos seamlessly.
You have good preview of footage even after adding effects (such as time lapse)
The image quality of exported files is as sharp as the original!!! That's new for me! :-)
BUT...
If you add soundtrack (or keep the original sound of the footage) you get a clicking noise in your final video... Everything's perfect except this sound issue!
See my video below to understand what I'm talking about (edited with trial version).
Now I hope their developers jump on this bug and fix it quickly coz I have to get my videos out there with sharp audio as well.
Are you also having the same sound problem with Edit Pro 17?
If your experience with GoPro HD MP4 video hasn't been very smooth then don't worry. Help is on its way to you!
Perhaps you can't import, convert or edit the MP4 clips in your current video editor and you feel you've been screwed paying $300 for a camera that doesn't allow you to do anything else but shoot...
NOT true my friend! I've been there and if it's one thing I've learned about internet it is this: whenever you have a problem, Google is there for you.
However, if you don't have the time to browse through endless search results looking for the right solution to your video editing issues then choose a certified shortcut and read the GoPro tutorials below.
Most of the links refer to articles on video editing tips but I guess your biggest wish is to learn how to convert the MP4 clips to AVI format as to be able to properly import and edit your extreme sports videos without buying another video editing software (check out the fifth link in the list for that).
I was supposed to take photos at my cousin's 4th grade graduation but instead I shot a video. It was another occasion to test my DIY glidecam and plus - I made her a star. :-)
Shooting video with a glidecam it's not only fun but it let's your creativity explode. You become more or less a bit of everyone on a movie set: you're the director, the cameraman, the technician, the guy with the lights, the screenwriter, etc. Just playing with the camera mounted on a steadicam makes you wanna experiment more that you would normally do with a hand held camera. I've seen both from the comments on YouTube as well on this blog that some of you have problems balancing your glidecam. There are a few simple steps for getting it right but the key is to have your glidecam built in a smart design that allows fast adjustments without too much hassle. Some key features of such a design include:
A telescopic tube for the shaft. If you can add the gimbal to a telescopic tube then you're one step closer to a professional glidecam. This will help you raise or lower the center of gravity in a snap!
If you can't integrate a telescopic tube then use a threaded bar. In this case you can make your adjustments either by moving the gimbal on the bar or by moving the upper and lower plates. Please note that the bearing is slid onto the bar and hold in place with two nuts tightened against each other ( the bearing being fixed between them).
Plates with channels for sliding the weights.
A smart plate for the camera. I couldn't find a self sliding plate but I drilled many holes in the laminate flooring (of which my plate is made) as to accommodate different types of cameras.
Wing nuts instead of regular nuts. Faster to operate and of course you won't need to carry any wrench with you. :-)
How To Balance Your Glidecam You should know that I only refer to the classic glidecam, not the Merlin design. Unlike the Merlin, the normal camera stabilizer has some advantages:
You can do 360° turns without having to move. Just stand still, raise the gimbal handle slightly above your head (it depends on how long the shaft is) and start rotating the camera around it's own axis by spinning the shaft.
You can make the glidecam top heavy and have the camera down and the weights up. This allows you to shoot at ground level - which is great when following a walking person (or a dog or even with no subject - sliding 5 centimeters above the ground creates an amazing effect).
You can shoot in all directions: forward, downward and upward. You can easily tilt the shaft with the left hand and thus point the camera wherever your subject is. The beauty of it is you can raise it above your subject and have a bird eye's view along with the gliding effect. That's pretty neat!
When balancing the glidecam you must have in mind that the center of gravity must be just below the gimbal as for the system to reach a state between a stable equilibrium and a neutral equilibrium. The videos below explain how to accomplish that. Even though they are using professional camera stabilizers all the principles apply to your own DIY steadicam as well. You can measure the balance of your rig by checking the drop time (1.5 to 3 seconds) and by spinning the glidecam to check for dynamic balance (watch first video - minute 6.50). Please note that while your home made glidecam may not have a sled (with a battery and remote monitor), it has the bottom weights plate instead (just like the glidecam in second video). Use the weights on the plate for fine tune balancing. How To Shoot Video with a Glidecam What you wanna shoot with a glidecam is a moving subject. That's the main purpose of any camera stabilizer - to help you capture a steady footage while following your subject (even on uneven terrain - no pun intended). You must know that the only thing a home made glidecam does is to keep your camera horizontal. That's it! The gimbal separates the movement of your hand, absorbing the jolts with it's three axis of rotation. The gliding effect is produced by our arm and by our walking with the subject. A professional steadicam comes with a mechanical articulated arm and a body vest that helps the operator to shoot without holding the weight of the entire system. Professional camera gear is both bulky and heavy and this comes in handy for the cameraman. In our case the articulated arm is no other than our own arm. Yes. We have three joints that absorb the shocks of our walking: the shoulder joint, the elbow joint and the wrist joint. All these together along with our knees and ankles provide the flying sensation (in the video) as we move our glidecam and camera through space. This gliding effect is also caused by the weight of the whole system. In other words - the heavier the system the more stable it will be when running after your moving subject. As you run, passing over obstacles (small rocks, etc), the camera tends to follow a straight line due to the inertia of the whole rig (camera and steadicam) - that's the gliding outcome. In order to get really smooth video you must practice holding the glidecam, tilting it, running with it, rotating it, etc. You'll get accustomed to it's sensibility and you'll become better with each small victory. Tips for glidecam video shooting
Shoot your moving subject from all directions. Walk before it, behind it, in lateral - and of course you can combine any of these methods with shooting from above (hold the glidecam up) or from below (make the glidecam top heavy as to have the camera down). Example: shoot from lateral and above or from behind and low. Mix all these techniques together wen editing the footage. If you shot with your camera upside down, rotate the footage within the video editor.
Give 180° capturing your passing subject. You can do this in two ways:
Stand still and spin the camera on the shaft as to follow the subject (the camera rotates on it's axis)
Move your arm describing half a circle, keeping your camera pointed at the subject. You will get an awesome movie like effect as the camera sweeps the landscape in an interesting way.
Rotate around your subject. Go round the subject and keep the camera pointed at all times towards the center of the imaginary circle.
Run after your subject. This will make your friends ask "How did you shoot that?!". The glidecam proves it's value when you get the steady footage while running with your subject. I was pretty blown away by that. :-) You can also run in front of your fast moving subject, just be careful not to trip as you're stepping backwards.
Move the camera against the subject (which is coming towards you) and pass it laterally. I stole this technique from a friend of mine - Brant Dempster. I'm sure I've seen this in movies as well but I just wasn't aware of it as I am now.
Follow the subject from behind, laterally and eventually end front shooting. Again this is a movie like technique that empowers the viewer. It makes the people watching the video feel they were there and thus they got the full picture (subject plus the landscape).
This list is by no means exhaustive and it's based solely on my observations of other's work. Feel free to correct me or add your experience in the comments. I'd love to hear from you. Shot videos using your DIY Glidecam! Cheers!
Just a short note for mountain bikers and other extreme sports lovers out there that have bought or wanna buy the new GoPro HD camera.
You don't really need to shoot your outdoor video clips in HD. The high definition footage offers great video quality but you'll have a hard time importing and editing it into your video editor.
Instead you can shoot in lowest resolution (r1) - 840/480 pixels at 60 fps 0r 120 fps with the HD Hero 2. The files are lighter (unlike the full HD videos) and thus easier for your video editor to handle. The video above was shot in r1 and the sharpness is just as good as with HD settings.
The 60 frames per second footage allows you to render action sports scenes in slow motion better than say full HD at 30 fps. You'll get smooth slow motion video, that is.
You may want to convert the GoPro MP4 clips to AVI before you do any editing on it.
A new friend of mine, Raul Robino, suggested a forum (GoPro User Forum) that teaches you how to render your video in slow motion using a video editor/mixer called tsMuxeR. You may wanna check that out.
And since we're here, let me show you the best dirt bike video ever!!! Shot with GoPro HD. And notice that the video is great mostly because of the editing, the awesome angle shots and the great stunts that those bikers pull - video quality is secondary (that's my opinion).
A wicked GoPro HD slow motion video suggested by Raul - freestyle skiing
Why take the trouble to edit your videos on music tunes?
Editing your videos "on the beat" will make your clips watchable and memorable. Imagine how would music videos be without the synchronization between the scenes and the tune... Pretty dull I would say.
Dynamic videos work great as teasers, trailers for almost any type of events, competitions, tours etc. Rocking music, like the one in my video, work well for action clips: motor sports, mountain biking, free-ride skiing, climbing. I knew from the first few seconds that I wanted to watch the Honda teaser to the end. Having video scenes rolling out on the melody will simply keep your viewers watching by catching their attention in the very first few seconds.
How To Edit Videos "On The Beat"
Firstly, you must import your music track within the video editor. You may not have any idea about the outcome but listening to the music and viewing some footage that you shot may bring up good ideas. If you need or want to use more songs then choose each song according to scenes you want to render. For slow motion scenes use soft music, for dynamic and aggressive action use engaging up beats. You wanna have your viewers pumped!
Zoom in on the tracks. Video editors allow you to "zoom" on scenes - basically allow to expand the segment that represents a scene as to view it in smaller time increments (fractions of a second). This enables you to cut your footage right where you want it - you can analyze it frame by frame and find the spot where you need to cut or trim the scene. For example if you have a mountain bike rider flying through air and want to cut the clip just when the bikerreaches the ground then you zoom in on the imported clip and drag the cursor at that particular point. Only the zoom mode can show you the exact time at which a certain event takes place in the video. Editing at such detail gives you full control - fine tuning - over the video.
Look for pitch changes in the music track. Perhaps you've noticed by now that most video editors show you the pitch graph on the music/sound track. This graph shows you both when the music grows loud/silent and when the pitch of the tune goes high/low. Seeing where the pitch of the sound track changes is key for editing videos on music beats. Scroll the track, find the tune changes and those will be the points where you'll have consecutive scenes - see picture below. Now you don't have to add a new scene with every beat change but where the song has good rhythm it would be nice to have some scenes rolling accordingly. The beat changes can be identified in the graph as visible high and low spikes neighbored by smaller, insignificant spikes.
Use dynamic scenes if your video shows action. For instance, the climbers in my clip are moving, leaping, swinging, jumping, falling. All this adds up to the urgency of the video. If you have rather static scenes you can also edit on the beat - just be aware of what it is that you want to convey with your video.
Use short scenes. This time we're talking less than a second scenes. Short scenes will enable you to do two things: keep your movie short (internet surfers have a short attention span) and cover all your footage (a few short scenes from each shooting session will tell the whole story, showing images that were taken in a long time span - a few hours or a few days).
Have shots from various angles mixed in the video. A sequence of various angle shots will keep your audience curious to see more whereas shots taken from the same perspective will bore the viewers. Keep it interesting.
I hope this helps. I stress the fact that I'm not a professional - I'm just a serious amateur. Feel free to add your own suggestions on video editing in the comments. Critique is eulogized here! :-)
How To Master Your GoPro Camera Like a Pro (even if you don't know anything about shooting or editing videos)
+ How To Make Money on YouTube (Bonus Section)
Don't freak out! I hate spam too.
Your email is safe with me.
+ You'll Also Get These Extra (FREE) Materials:
How To Get Free Outdoor Gear from Sponsors
How To Make Viral Videos - 3 Lessons from Devin Graham (King of YouTube)
3 Cool Ways To Get Paying Clients as a Videographer
How To Be Creative without The Pressure
You Don't Have To Struggle To Learn How To Shoot and Edit GoPro Videos on Your Own. Take The GoPro Video Editing Course and Easily Publish Your First Video without Mistakes.
Hi! My name is Constantin and I'm an outdoorsy dude who enjoys shooting and editing action sports videos. Here you can learn GoPro tips, how to build DIY video gear and you can also read our outdoor gear reviews. More about me here.
Testimonial
GoPro (the company) on my DIY Steadicam Tutorial:
"An advanced How To for the hardcore film makers"




 How To Balance Your Glidecam You should know that I only refer to the classic glidecam, not the Merlin design. Unlike the Merlin, the normal camera stabilizer has some advantages:
  Tips for glidecam video shooting
  Shot videos using your DIY Glidecam! Cheers!


